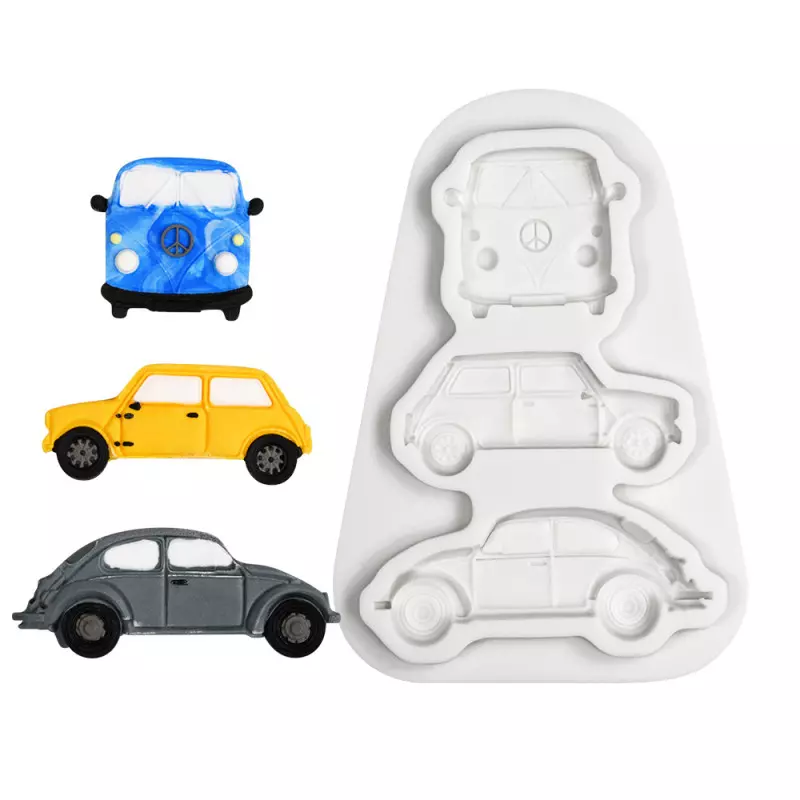
Create a cake with ease thanks to this silicone mold , which lets you use sugar paste, candy melts, Isomalt or chocolates to make up to 3 very realistic car styles to place on your creations.
It can withstand temperatures ranging from -60°C to 230°C, which means you can use it for hot or cold molding, whether with hardening sugar paste or melting chocolate. You'll have all the flexibility you need to create perfectly shaped and detailed cars , whatever material you choose.
Let your imagination run wild and turn your creations into a tribute to the timeless beauty of vintage cars.
Tips for using Sugar Dough or Gumpaste :
- Mould preparation: Sprinkle the mould lightly with cornstarch and tap to remove any excess.
- Preparing the Pastry: Start with a small roll of sugar paste or gumpaste and place it in the mold. Keep the fingers of both hands sprinkled with cornstarch to prevent the dough from sticking to your hands.
- Shaping the dough: Use your fingers to gently press the dough into the mold, working from the center outwards.
- Using a rolling pin: For a flawless finish, run a rolling pin over the surface of the mold to press the dough firmly into place. Sprinkle the rolling pin with cornstarch to prevent the dough from sticking.
- Trimming the excess: Use a clean, dry knife or scalpel. Run the blade through the cornstarch to prevent the dough from sticking. Place the blade flat on the surface of the mold and carefully cut away the excess dough with a light sawing action. For larger molds, it may be useful to clean and dry the blade halfway through the process.
- If you're working with very complex molds, we recommend placing the mold in the freezer for 10-15 minutes. Once thawed on a clean, dry surface, the dough will be damp and sticky. Avoid touching it during this phase. Depending on the type of dough used and the ambient humidity, your creations should be dry to the touch within 10 to 30 minutes. Make sure they are completely dry before transferring them to the cake, using royal icing as an adhesive if necessary.
- Gentle unmolding: Gently turn the mold upside down and remove from the mold. If necessary, you can use a fine point to help release the dough.
Care: Can be washed in soapy water or dishwasher.
Dimensions: 13 x 9 cm


 4.9/5
4.9/5